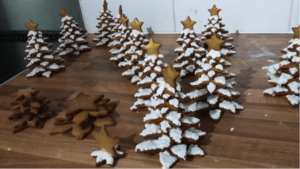
Gingerbread Christmas Trees
A message from Monika, our Director of Curriculum – “Making these Christmas trees is one of my favourite Christmas traditions. They are a perfect gift and can be either eaten or displayed to make a room smell like Christmas!”
Ingredients for approximately 8 trees:
 Pipe out a blob of icing on one of the biggest stars and place another one on top of it, pressing slightly. Then put another blob on top and put the next-in-size star on top of the other two. Keep working your way to the top of the trees. You might want to give it a few minutes to dry out in between the layers to make sure the trees are straight. Put the last smallest star vertically on top of the tree (see photos).
Decorate your trees with the remaining icing and any edible decorations you like! You can add few drops of colouring to the icing to make the tree green, you can put small edible pearls as Christmas tree baubles – the sky is the limit!
Happy Holidays!
- ¼ cup clear honey
- 80g butter
- ½ cup fine light brown sugar
- 2 and ¼ cup all purpose flour
- 1 teaspoon baking soda
- mixed ground spices (2.5 tsp cinnamon, 1 tsp ginger, 1/3 tsp cloves, 1/3 tsp cardamom, ½ tsp allspice, ½ tsp nutmeg, ½ tsp black pepper)
- 1 teaspoon cocoa powder
- 1 egg
 Pipe out a blob of icing on one of the biggest stars and place another one on top of it, pressing slightly. Then put another blob on top and put the next-in-size star on top of the other two. Keep working your way to the top of the trees. You might want to give it a few minutes to dry out in between the layers to make sure the trees are straight. Put the last smallest star vertically on top of the tree (see photos).
Decorate your trees with the remaining icing and any edible decorations you like! You can add few drops of colouring to the icing to make the tree green, you can put small edible pearls as Christmas tree baubles – the sky is the limit!
Happy Holidays!


